Hardware Setup
In this guide, we will use a camera with an IP number of 192.168.1.90 transferring on port 50004 as an example. A basic setup for software development could look as Figure 1. You need to have the IP camera, display and development environment connected to the same network.
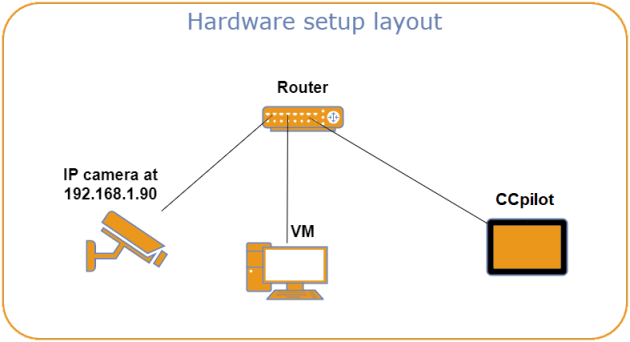
Figure 1. Example of a setup for developing applications with IP camera support.
Configure the Camera
The camera needs to be configured to work with the display. IP number, port number and the encoding type for the image are properties that must match between the camera and the software that displays the video stream. You can use our tool eth-camera-configurator, that is included in the Camera Module, to configure any camera that supports the ISO17215 standard. Misconfiguration of the camera may cause serious malfunction! Please refer to the manual of your camera for further details.
This example shows how to subscribe to Region of Interest (ROI) index 0 of the camera using the eth-camera-configurator:
eth-camera-configurator subscribe 0 --ip 192.168.1.90
Connected to camera using ip: "192.168.1.90" , port: 17215
Set Camera Exclusive:	 "E_OK"
Subscribe RoI index: 0 	 "E_OK"
Erase Camera Exclusive:	 "E_OK"
Disconnected.
You can type eth-camera-configurator –help to get information about the available commands.
💡 If you have difficulties to get the camera stream to display properly you can use a network analysis tool, such as Wireshark, to check that the camera is streaming data and that the expected IP number and port has been set.