How-tos
Create and remove signals
New signals can be created or removed by using the add and remove buttons located in the top left corner. Created signals are added to the pool of available signals and can be used by other LinX Manager plugins.
Update projects
Select a project from the project bar drop-down menu. An asterisk (*) beside the project name will indicate that the configuration have been changed (signal added, renamed or removed). Press “Save” for the changes to take effect.
New files will be generated and stored in the selected projects working directory. These files are then included via
LinXManager.pri by a include directive in the *.pro file. Necessary code to access the configured signals are
injected into main.cpp if the Qt project type is QML.
Supported project types
Both QML and Widget based Qt projects are supported by the configurator. QML projects have enhanced support and are automatically updated with the required code to have direct access in the GUI. Widget based project have the required files added to the project but needs to be included manually in the source.
Generated files
List of files which are generated and stored in the selected project when the configuration is saved:
LinXManager.pri
dataenginebase.cpp
dataenginebase.h
dataengine.cpp
dataengine.h
dataenginesignal.cpp
dataenginesignal.h
idataenginesignalerror.cpp
idataenginesignalerror.h
LinXManager_DE_configfile.json
qtobserver.cpp
qtobserver.h
Revert current changes
Use the “Load” button to restore the last known configuration and reject current changes.
Access signals from the UI
QML
Qt projects based on the CrossControl Qt Quick 2 Application project template are prepared to work directly with the
configurator. LinX Manager Data Engine injects main.cpp with the required code to make the configured signals
available directly in QML. Each configured signal is available as a Q_PROPERTY in the DataEngine class. The instance
is accessible in QML via the context property called dataEngine.
QQuickView *view = new QQuickView;
// <LINX MANAGER> //
...
DataEngine dataEngineContext;
qmlRegisterUncreatableType<DataEngine>("CrossControl", 1,0, "DataEngine", "Don't instance DataEngine");
view->rootContext()->setContextProperty("dataEngine", &dataEngineContext);
// </LINX MANAGER> //
Read signals from QML
Text {
    text: dataEngine.engineRPM.value
}

Gauge {
    minimumValue: 0
    maximumValue: 100
    value: dataEngine.oilPressure.value
}

StatusIndicator {
    active: dataEngine.engineError.value
    color: "red"
}
Write signals from QML
Slider {
    from: 0
    to: 100
    value: 50
    onValueChanged: dataEngine.heatLevel.value = value
}

Button {
    text: "Request stop"
    onPressed: dataEngine.requestStop.value = true
    onReleased: dataEngine.requestStop.value = false
}
Widget
The configurator has basic support for Widget projects based on the CrossControl Qt Widget Application project
template. Generated files are added to the project (headers and classes needs to be imported manually):
Read and write signals from widgets
Example how to add DataEngine to widget class Application and connect two configured signals to local slots:
// application.h
#include "LinXManager_DataEngine/dataengine.h"
class Application : public QWidget
{
    Q_OBJECT

public:
    explicit Application(QWidget *parent = nullptr);
    ~Application();

public slots:
    void setEngineRpm(int value);
    void setOilPressure(int value);

private:
    Ui::Application *ui;
    DataEngine dataEngine;
};
// application.cpp
#include "application.h"
#include "ui_application.h"

Application::Application(QWidget *parent) : QWidget(parent), ui(new Ui::Application)
{
    ui->setupUi(this);
    connect(dataEngine.engineRpm(), &IntConsumerSignal::valueChanged,this,&Application::setEngineRpm);
    connect(dataEngine.oilPressure(), &IntConsumerSignal::valueChanged,this,&Application::setOilPressure);
}
Run application on CCpilot
The application is injected with the necessary source code to communicate with Data Engine. No additional files need to
be deployed on target besides the application. It is required to have LinX-Base v4.0.0 or newer installed on the
CCpilot for the application to run properly.
Rename global signals
The renaming of signals can be performed through any of our configurators. However, users using the configurators for renaming are restricted to signals used in a single location, signals used across multiple locations cannot be renamed in this manner. This is to prevent ambiguous cases when it’s unclear if an existing signal should be renamed or replaced with a new signal.
This restriction does not apply when renaming signals using the Data Engine configurator as it supports global renaming.
Setting default values of signals
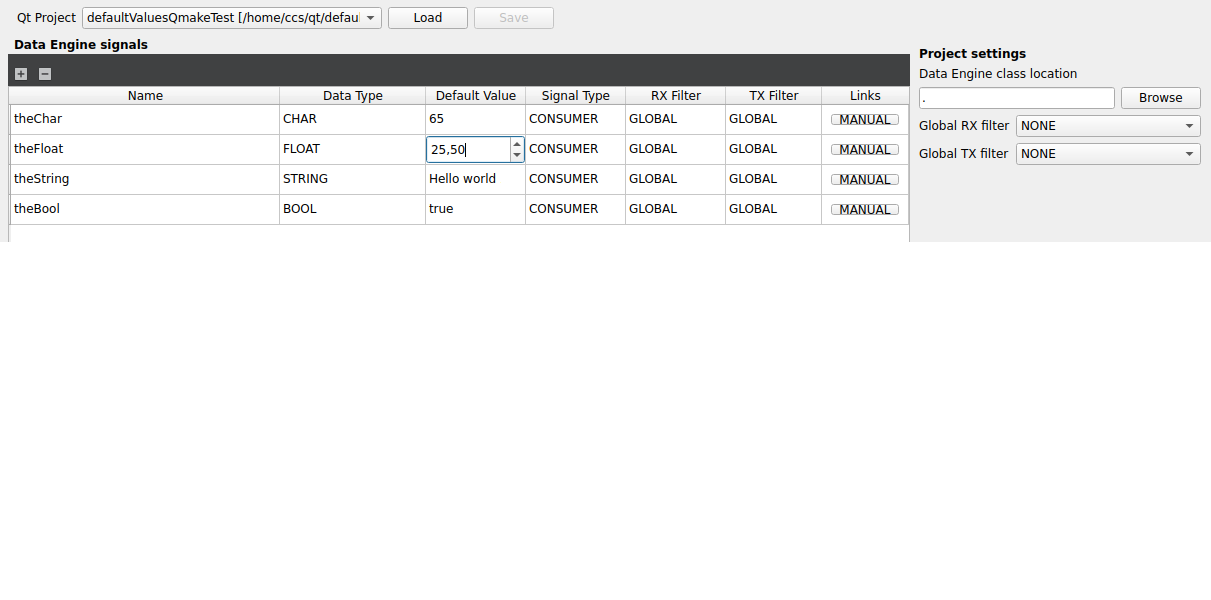
By editing the column for Default Values you can set an initial value for each signal which will be used until you programatically change the value. Appropriate editor will show up for the datatype you edit default value for. If you don’t set a default value numeric values will be set to zero, bools to false and blob/strings to an empty byte array.

Depending on which datatype the signal has you can enter text or numbers.